

Key Takeaways
Why Repair Method Matters
Not all drywall damage is equal, and using the wrong repair approach wastes time and materials. A heavy-duty backer-board patch on a simple nail hole adds unnecessary steps; conversely, spackle alone on a 3-inch hole will crack and fall out within weeks. Scaling your technique to the actual damage produces durable, paint-ready results the first time.
Drywall is a composite material - a gypsum plaster core sandwiched between paper facings. Repairs work by recreating that layered strength: mesh or drywall provides structure, joint compound fills and levels, and primer seals the surface for paint adhesion. Understanding this sequence helps you avoid the most common DIY mistakes, such as applying too-thick coats or skipping the primer.
Check for Hidden Wiring and Plumbing First
Before cutting into any wall, use a stud finder with AC wire detection to scan the repair area. Pipes and electrical cables often run through wall cavities where you cannot see them. Cutting blindly into a live wire is a serious shock hazard. If you suspect utilities are behind the damaged area, consult a licensed electrician or plumber before proceeding.
Most interior drywall repairs are straightforward projects well within a beginner's reach. The skills you build here transfer directly to other maintenance tasks - for example, understanding wall construction is useful context when you're inspecting crawl spaces and attics for moisture or structural issues.
What You'll Need
Gather your materials before starting - mid-project hardware runs extend drying time and break your workflow. The list below covers all three repair sizes; pick only what your specific damage requires.
Lightweight spackle or joint compound
Fills nail holes, small dents, and provides the finishing coats on larger patches.
Putty knife (3-inch and 6-inch)
Applies and feathers compound smoothly across the repair area.
Self-adhesive mesh patch (4"-6" sizes)
Bridges medium-sized holes up to about 4 inches without requiring a backing board.
Drywall backer board or scrap piece of drywall
Provides a solid anchor for patches on holes larger than 4 inches.
Drywall screws and screw gun
Secures backer boards and replacement drywall panels inside the wall cavity.
Drywall primer
Seals the compound and creates an even base coat before painting.
Sanding sponge or 120-grit sandpaper
Smooths dried compound layers to a wall-flush finish.
What you will need
Step-by-Step Repair Instructions
Assess the damage and choose your method
Measure the hole or damage area before buying any materials. Use these general size categories as your guide:
- Nail holes and small dents (under ½ inch): Lightweight spackle applied with a fingertip or putty knife, sanded flush when dry.
- Medium holes (½ inch to 4 inches): Self-adhesive mesh patch backed with two to three coats of joint compound.
- Large holes (4 inches to fist-sized): California patch method or a backer-board-supported drywall piece with joint compound and mesh tape.
For holes caused by doorknobs or accidental impacts, also check whether the surrounding drywall is soft or crumbling - damaged paper facing must be trimmed away cleanly before patching.
Prepare the damaged area
Use a utility knife to trim any torn drywall paper, loose chunks, or frayed edges around the hole. The perimeter of the repair area should be clean and solid. For nail holes, simply press any raised nails flush with a hammer before applying compound - a slightly dimpled surface holds filler better than a protruding nail head.
Wipe the area with a dry cloth to remove dust. Adhesion of both patches and compound depends on a clean, dry surface.
Apply the patch backing (medium and large holes only)
For medium holes (mesh patch method): Center a self-adhesive mesh patch over the hole and press firmly so all edges adhere to the surrounding drywall. The mesh becomes the armature for your compound coats.
For large holes (backer board method): Cut a piece of scrap wood - a 1×3 or 1×4 works well - several inches longer than the hole's height. Slide it into the hole, hold it flush against the inside face of the wall, and drive drywall screws through the existing drywall into the backer on both sides of the hole. Cut a drywall patch to fit the opening, screw it to the backer, then apply self-adhesive mesh tape over all seams.
Apply the first coat of joint compound
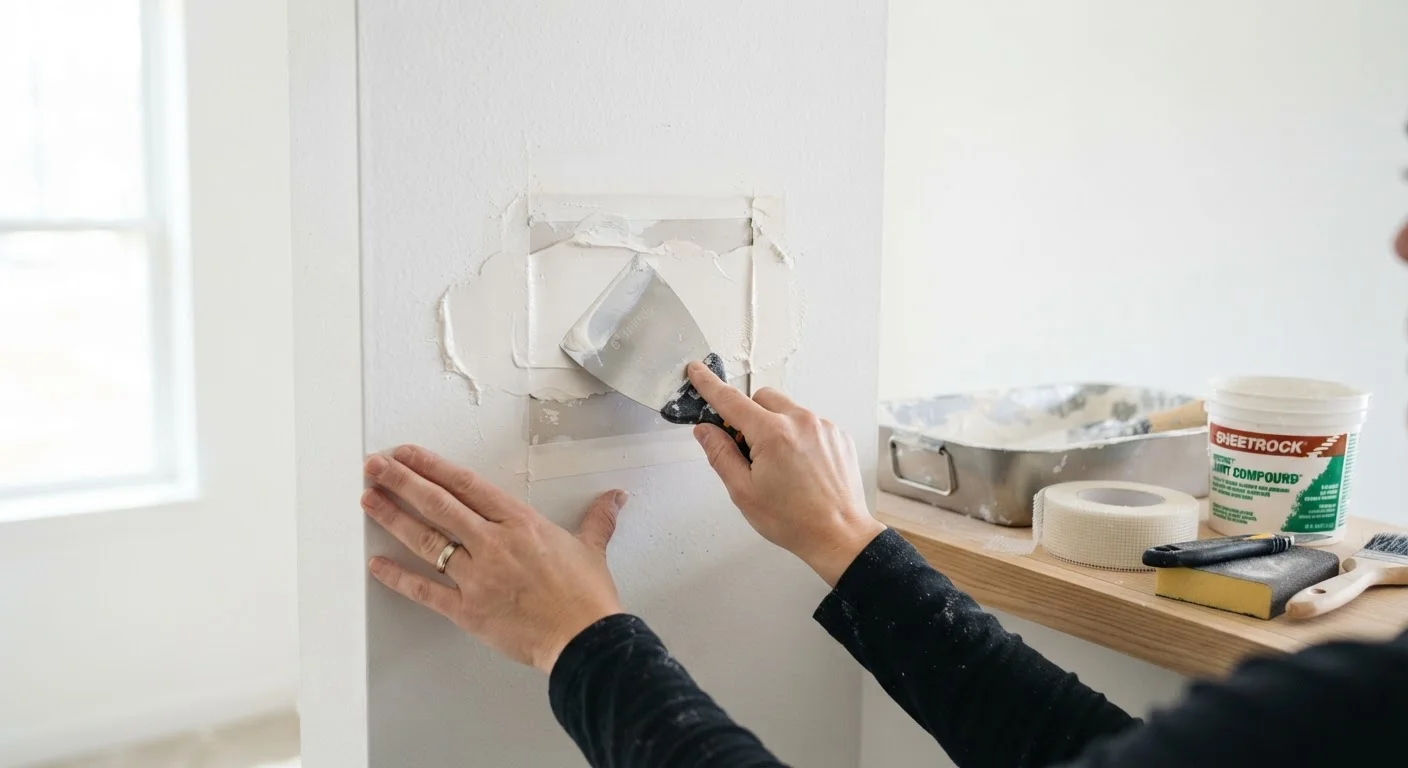
Load your 6-inch putty knife with a moderate amount of premixed joint compound. Spread it across the patch in smooth, overlapping strokes, pressing firmly to force compound into the mesh or seams. Aim for an even, thin layer - heavy first coats shrink and crack as they dry.
Feather the edges outward onto the surrounding wall surface by reducing pressure at the knife's trailing edge. Allow this coat to dry completely - typically 24 hours at normal indoor temperature and humidity. The compound will lighten in color as it cures.
Sand, apply second and third coats, and finish
Once the first coat is fully dry, sand lightly with a 120-grit sanding sponge to knock down ridges. Wipe away dust with a dry cloth, then apply a second, wider coat - extending it 2 to 3 inches beyond the first. Repeat the drying and sanding cycle. A third thin coat is typically needed for medium and large patches to fully hide the mesh and seams.
After the final coat dries, sand the entire repair zone until it is level with the surrounding wall. Run your hand across the surface - you should feel no ridge where the patch meets the original drywall.
Prime and paint the repaired area
Apply drywall primer over the entire repaired zone and allow it to dry per the manufacturer's instructions. Priming is not optional - bare joint compound absorbs paint differently from the surrounding wall, producing a dull patch visible even through multiple paint coats.
Once primed, paint with your matching wall color. For best results, roll or brush slightly beyond the patch edges to blend the sheen. In some cases, repainting the full wall section between corners produces the most seamless result.
Feather Wide, Sand Lightly
The secret to an invisible patch is extending each coat of compound several inches beyond the previous one - this blends the edge gradually into the surrounding wall. When sanding, use a sanding sponge with 120-grit and work in circular motions to avoid creating flat spots or gouging the surface.
Don't Skip the Primer Step
Painting directly over joint compound - even when it appears bone dry - draws moisture from the paint unevenly. The result is a dull, blotchy patch that shows through your topcoat. Always apply a coat of drywall primer and let it cure before finish painting.
Common Mistakes and How to Avoid Them
Even experienced DIYers run into a few predictable pitfalls with drywall patching. Knowing them in advance prevents frustration and do-overs:
- Applying compound too thick: Compound shrinks as water evaporates. A thick single coat dries with a sunken, cracked center. Thin multiple coats always outperform one heavy application.
- Sanding too aggressively: Over-sanding cuts through the paper facing of surrounding drywall, creating a fuzzy surface that soaks up paint unevenly. Sand with light, controlled strokes.
- Skipping seams on large patches: Bare butt joints between new and old drywall will crack without mesh tape and compound reinforcement.
- Painting before priming: As noted above, this is one of the most common reasons a patch remains visible after painting.
If your home has recurring wall damage from settling, humidity fluctuation, or impact points like doorknobs, address those root causes alongside the cosmetic repair - adding a doorstop, for instance, prevents the next hole before it forms. Maintaining the envelope of your home - walls, roof, and drainage - works as an interconnected system, much like the exterior maintenance covered in our gutter cleaning and inspection guide.